Not seeing a Scroll to Top Button? Go to our FAQ page for more info.

Organic Seasonal Produce

What a wonderful start to the long bank holiday weekend we have had here at IDEAS, two of our lovely customers who grow their own fruit and vegetables brought in boxes of homegrown produce for us to enjoy over the weekend, we really do have the best customers.

Helen quickly got to work using some of the produce by making a beautiful meal of beef wellington, roast potatoes and lots of the wonderful vegetables. Next on her list is to use is the beautiful rhubarb in which a Rhubarb cake is going to be made, below is the recipe for you all to try at home.

Please note that we are closed this bank holiday from Saturday 24th August - Monday 26th August and re-open on Tuesday 27th August at 9am. We hope you have a lovely, relaxing weekend full of sun!

Insta post veg.jpg

Ingredients

For the cake

300g Rhubarb

165g Self raising flour

175g Butter

175g Caster sugar

3 Large eggs

2 tsp Vanilla paste

Juice of ½ a lemon

For the crumbly topping

25g Butter

2 tbsp Self-raising flour

1 tbsp Caster sugar

2 tsp Ground ginger

Cream or ice cream to serve

Method

Preheat the oven to 180 c, fan 160 c. Grease and line a 23cm square tin

Trim and chop the rhubarb stems into 3cm pieces, mix with the lemon juice & set to one side

Whisk the remaining cake ingredients together to make a smooth batter

Fold in half the rhubarb and spoon the mixture into the greased tin, scatter over the remaining rhubarb

For the topping, rub the butter into the flour until the mixture resembles breadcrumbs, then stir in the sugar & ginger. Sprinkle over the cake batter and bake for 50 minutes

Remove from the oven and cool in the tin for 10 minutes before turning out

Cut the cake into squares and serve warm or cold with a big dollop of cream or ice cream.

Recipe taken from the Sainsbury’s magazine

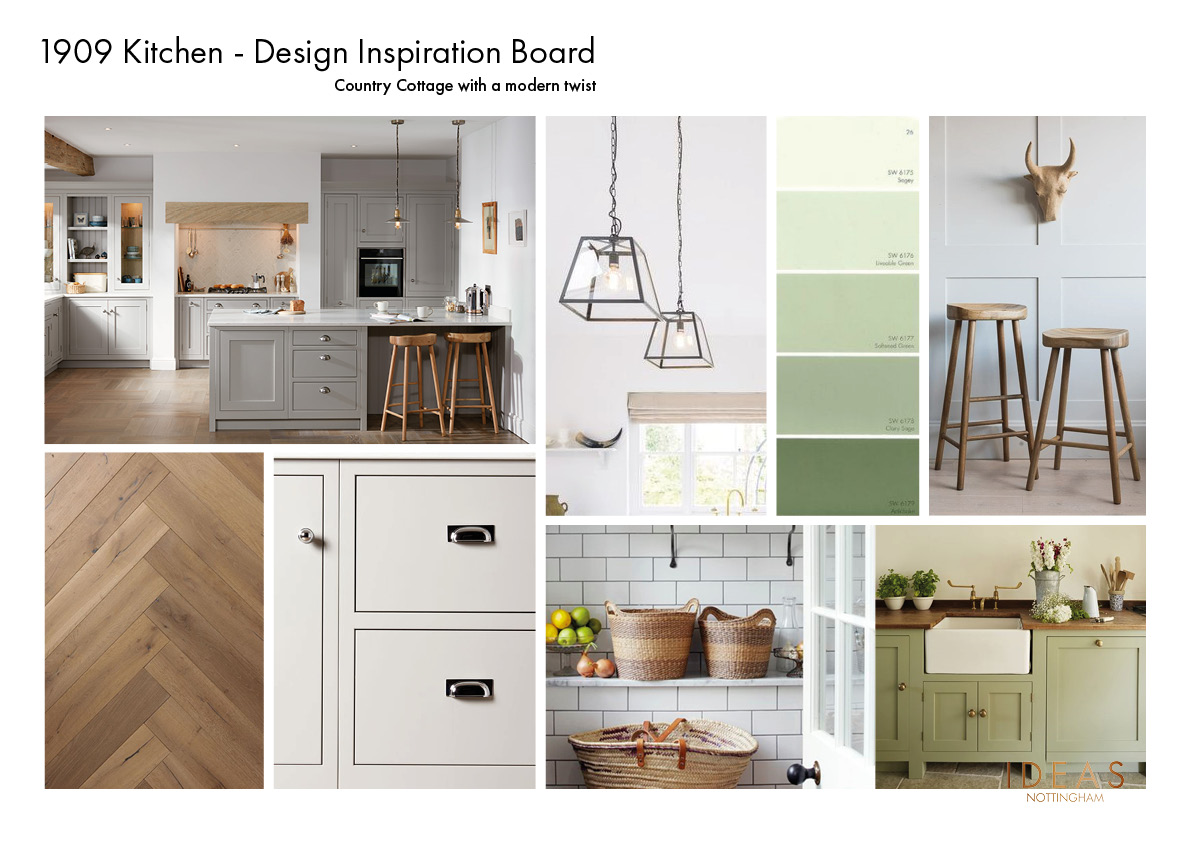
Moodboard Fun!

If you are starting to think about designing your new kitchen it can feel like a very daunting and at times overwhelming task that can often put people off for years, but there are a few key things you can start to do that can make your experience a whole lot less stressful and enjoyable!

1909 shaker Moodboard.jpg

Your Wish List

We always start by asking our customers how the space needs to work for them, their needs and how they operate in the kitchen. Some of you absolutely love nothing more than cooking everyday, baking and having large family gatherings others simply want to hear the ping of a microwave and the speed of a boiling water tap, talking through these factors are vital to getting the design of your kitchen working for you. With that in mind between you and your family start jotting down your ‘wish list’, what are the things you couldn’t live without and what are the things that you would dream of having in your kitchen? This could be anything from an under cabinet dog bed (yes we can do this for your furry friend!) to quartz worktops.

Moodboarding

Traditional moodboarding comprises of a physical board of ideas comprising of an overall interiors theme, this could include fabric, flooring and paint samples along with inspirational imagery that you may of seen in a magazine or online. This is a really fun way of getting your creative ideas flowing, you could do several to see which theme you are gravitating towards the most. Even better get the children to do their own for a fun summer activity and see who’s you all love the best or take elements from a few.

Pinterest

Oh Pinterest how we love you but how you play with our minds! Pinterest is the easiest, quickest and simplest way to create an online moodboard of all your favourite looks and likes. But beware with pinterest that your head can be turned easily, one minute you see a beautiful shaker style white kitchen the next a charcoal grey handless that equally fills your designer heart with joy, both completely opposite both you love, so which to choose? We have this a lot with customers who just find the choice overwhelming, our advice? Stop pinning so much! Go back to your first love, which scheme do you time and time keep going back to? This is the one you will most likely be able to live with in the long term. We love Pinterest and its really helpful when customers come in with their online boards but just vigilant of getting into a Pinterest rabbit hole!

So when It comes to moodboarding, the first rule is to have fun! Go with all the crazy ideas your heart desires at first, colours, styles, fabrics or it may just start with a beautiful bar stool you just have to have and we can go from there. Then pop into the showroom here at IDEAS and we can help you consolidate all your wild kitchen fantasies into the beautiful and bespoke kitchen of your dreams. Contact us today to book your appointment and start your new kitchen journey.

IDEAS' moment in the spotlight

A big hello from us all at IDEAS kitchens, we have been a bit quiet on here of late as we have been so busy designing kitchens for you lovely lot! We found out recently that one of them has even made it into the national Interiors magazine HomeStyle Magazine in their August 2019 edition, which we are so proud of. A beautiful Remo gloss door finished in porcelain with marble white quartz worktop and NEFF appliances. We think it looks fab, what do you think?

magazine digital 3.PNG
DGRGLEN121.jpg
DGRGLEN120.jpg

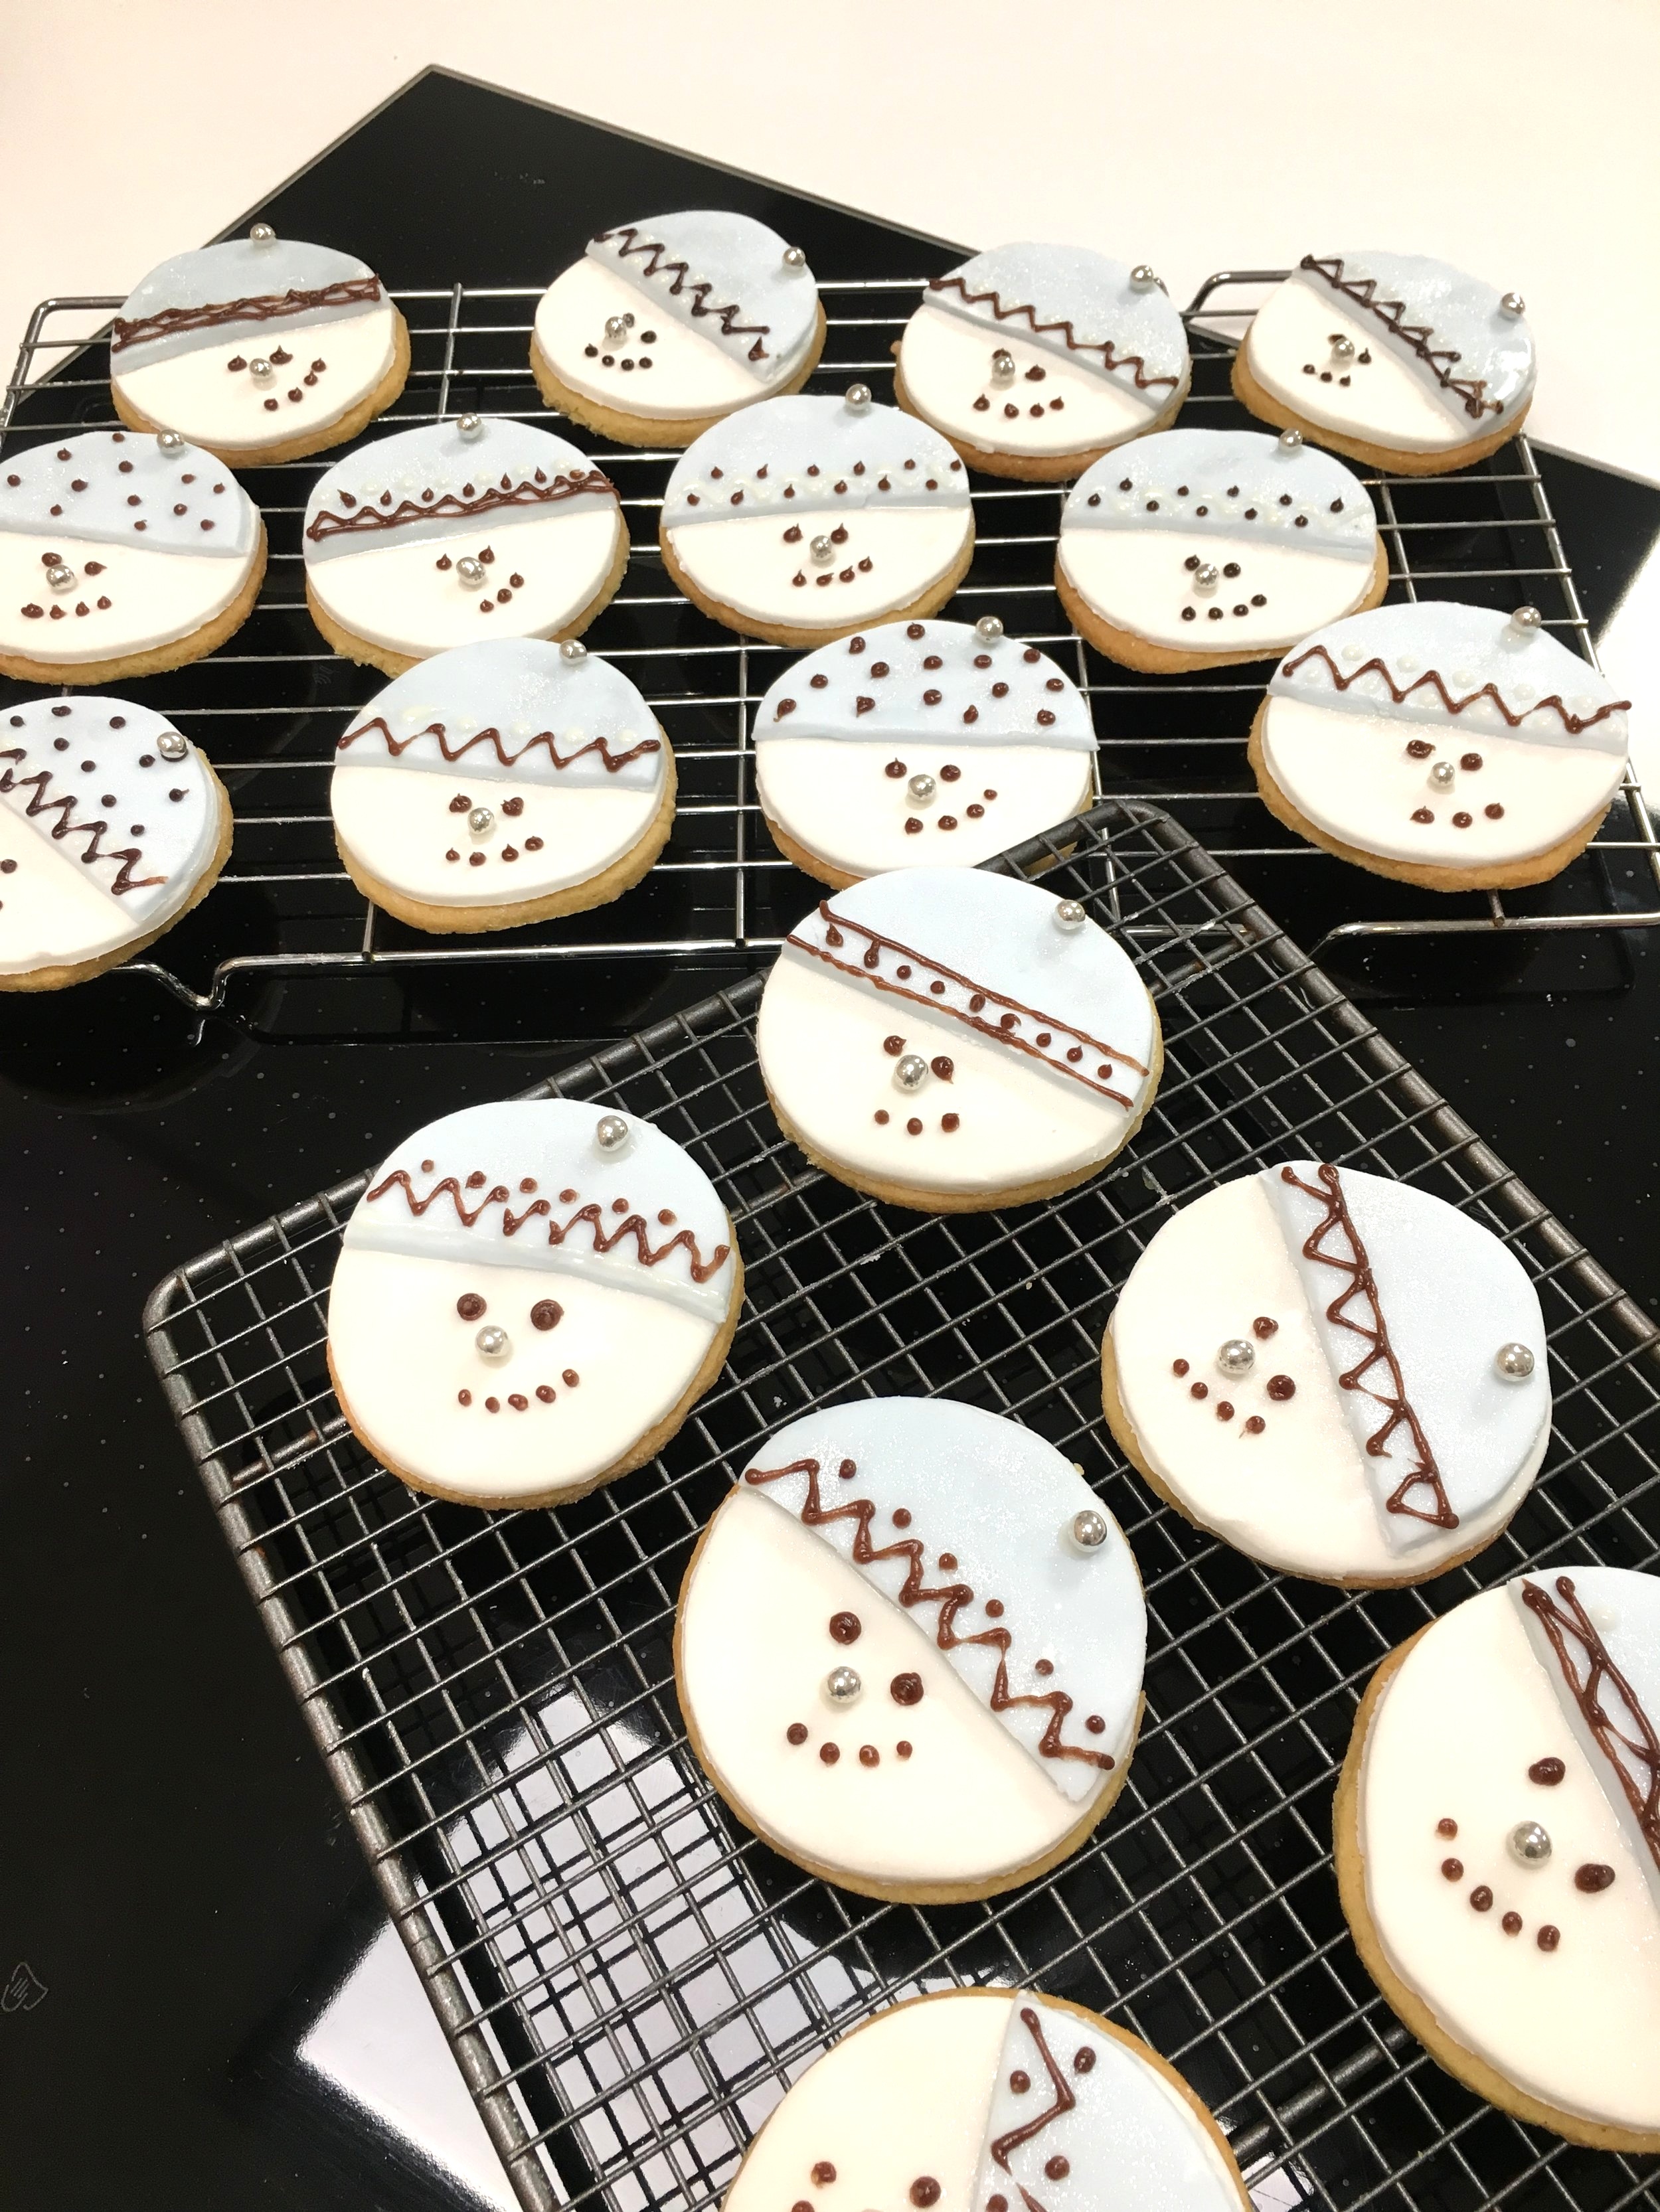
Snowman Christmas Biscuits

These Christmas biscuits are beautifully buttery, sweet and perfect for the holiday season! The cookies themselves are really easy and quick to make and the topping can be anything you want it to be, so a really great Christmas holiday activity to do with your children or grandchildren. We went for little snowmen and they have gone down a treat in the showroom!

This recipe makes 15-20 depending on the size of your cookie cutter.

For the biscuits

7oz Self raising flour

3½ oz Soft brown sugar

4oz Salted butter

1 large free range egg

1 tsp Vanilla paste

For the decoration

1 block of ready to roll fondant icing

Food colouring of your choice (to dye half of the fondant icing)

Icing pens

Silver edible balls

Edible glitter (optional!)

Method

Pre heat the oven 180C

Mix together the flour and sugar then begin to rub in the butter with your fingertips until fine breadcrumbs are formed.

Add in the egg and vanilla paste to the breadcrumb mix until a soft dough is formed (don’t worry if it feels a little sticky)

On a well floured surface begin to roll your sweet dough with a rolling pin. Use a cookie cutter of your choice to cut into desired biscuit shapes! Place the biscuits on a well greased baking tray and pop into the oven for 10-12 minutes or until golden brown. They will feel a little soft when first taken out of the oven but they will harden.

Cool on a wire rack. Begin to decorate when they are completely cool.

Roll out the white fondant icing and cut with the same sized cookie cutter as your biscuits, brush the back of each circle with a little warm water and place onto each biscuit.

Dye the other half of the fondant icing (We went with light blue) and cut to the same size as the white fondant icing. Then cut each circle in half to create the snowman’s hat! Brush the back of each hat with warm water and stick on top of the white circle.

Using the icing pens, pipe on eyes, a mouth and a nose which you can stick the edible balls to. Add any additional decoration such as hat detail and then brush with edible glitter for an extra special touch! Allow to set.

Happy Christmas x

Merry Christmas from all of us at IDEAS!

Merry Christmas and a Happy New Year to you all!

We would like to thank you each and every one of you for your continued support and custom in 2018, it has been such an amazing year for us here at IDEAS with many exciting projects completed for so many wonderful customers and plenty in the pipeline for 2019.

We will back on Wednesday 3rd January 2019, ready to design and fit lots of new kitchens, bedrooms and bathrooms for you all and of course all done with a little cake on the side by Helen.

By choosing us to design your dream spaces you are helping to keep your local highstreet alive and a dream afloat and for that we cannot thank you all enough.

Christmas wishes,

Helen, Paul, Hope, Matt and Ady x

Happy Holidays! (1).png

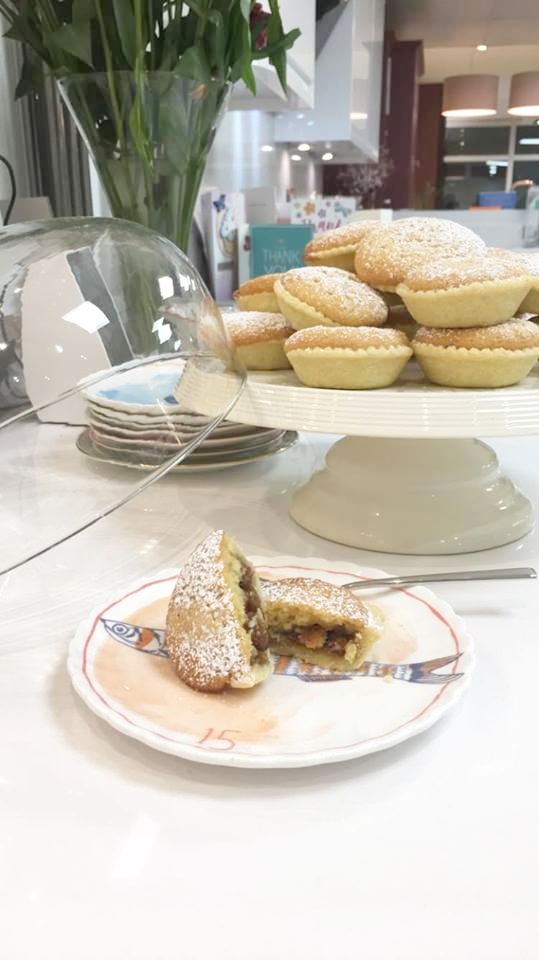
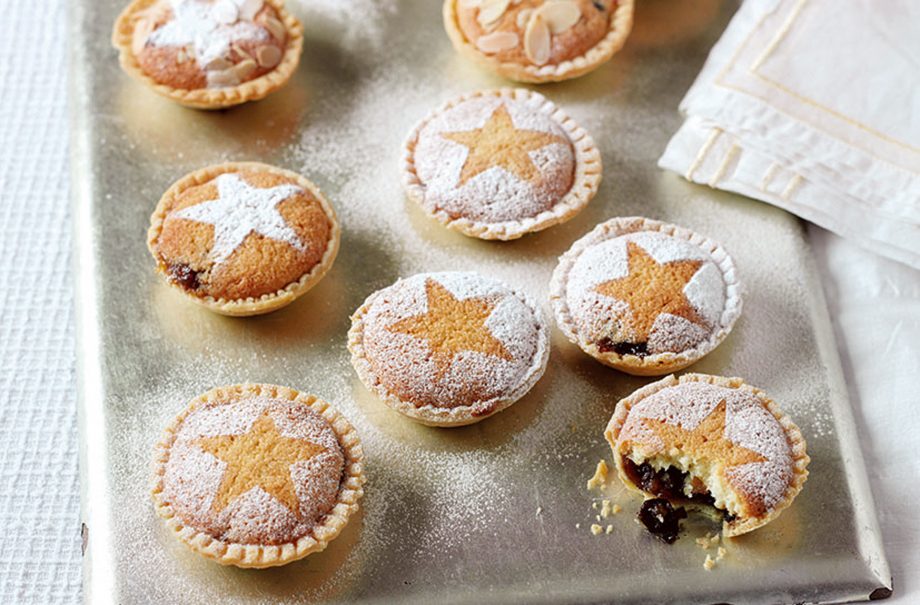
Mince Pies with a Twist

The epitome of Christmas time, the humble mince pie! But they aren’t always everyone’s cup of tea, due to their sometimes overpowering filling. Helen of IDEAS has come up with a recipe that takes the edge of the often overfilled mince pie. Beautiful mincemeat, encased in homemade butter pastry with a sponge top to balance the pie. Perfect with a cup of tea after a festive day of fun!

For the pastry: (You could also buy a block of shortcrust pastry)

4oz Butter

8oz Plain Flour

6oz Soft Brown Sugar

A pinch of salt

A tiny bit of water!

For the cake topping:

6oz Butter

6oz Soft brown sugar

8oz Plain Flour

3 Eggs

1 ½ tsp baking powder

Pinch of salt

2 tbsp of milk

1tsp Vanilla paste

For the mincemeat filling:

1 jar of good quality mincemeat

2oz Butter

A good glug of maple syrup

Method

To make the pastry rub together butter, sugar, flour and salt until fine breadcrumbs are formed. Slowly add in water to bind the mixture together until a ‘ball’ is formed. Leave the pastry to rest whilst the filling is made.

For the mincemeat mix, combine all the mincemeat filling ingredients into a pan and put over a medium head until butter has fully melted and the mixture has started to turn silky. Take of the heat and allow to cool.

Set the oven to 160°

To make the sponge topping, cream the butter & sugar together until light and fluffy. Using a spatula gently fold in one at a time the eggs with a spoonful of flour and the baking powder until all are mixed in. The mix may feel a little thick at this point so add in a little of the milk at a time until the desired consistency is reached.

Grease 2 x 12 case cupcake tins.

Roll out the pastry until around 1cm thick and using a round 9/10cm cookie cutter make 24 cookie rounds. Pop each pastry round into the tin and spoon a teaspoon of the mincemeat mixture into each pastry case (leaving enough room on top for the sponge!) Top each mincepie with a teaspoon of cake mixture.

Pop each tin into the preheated oven for 20mins or until the cake mixture is looking golden brown and springs back when touched.

Enjoy with a cup of tea or a glass of mulled wine!

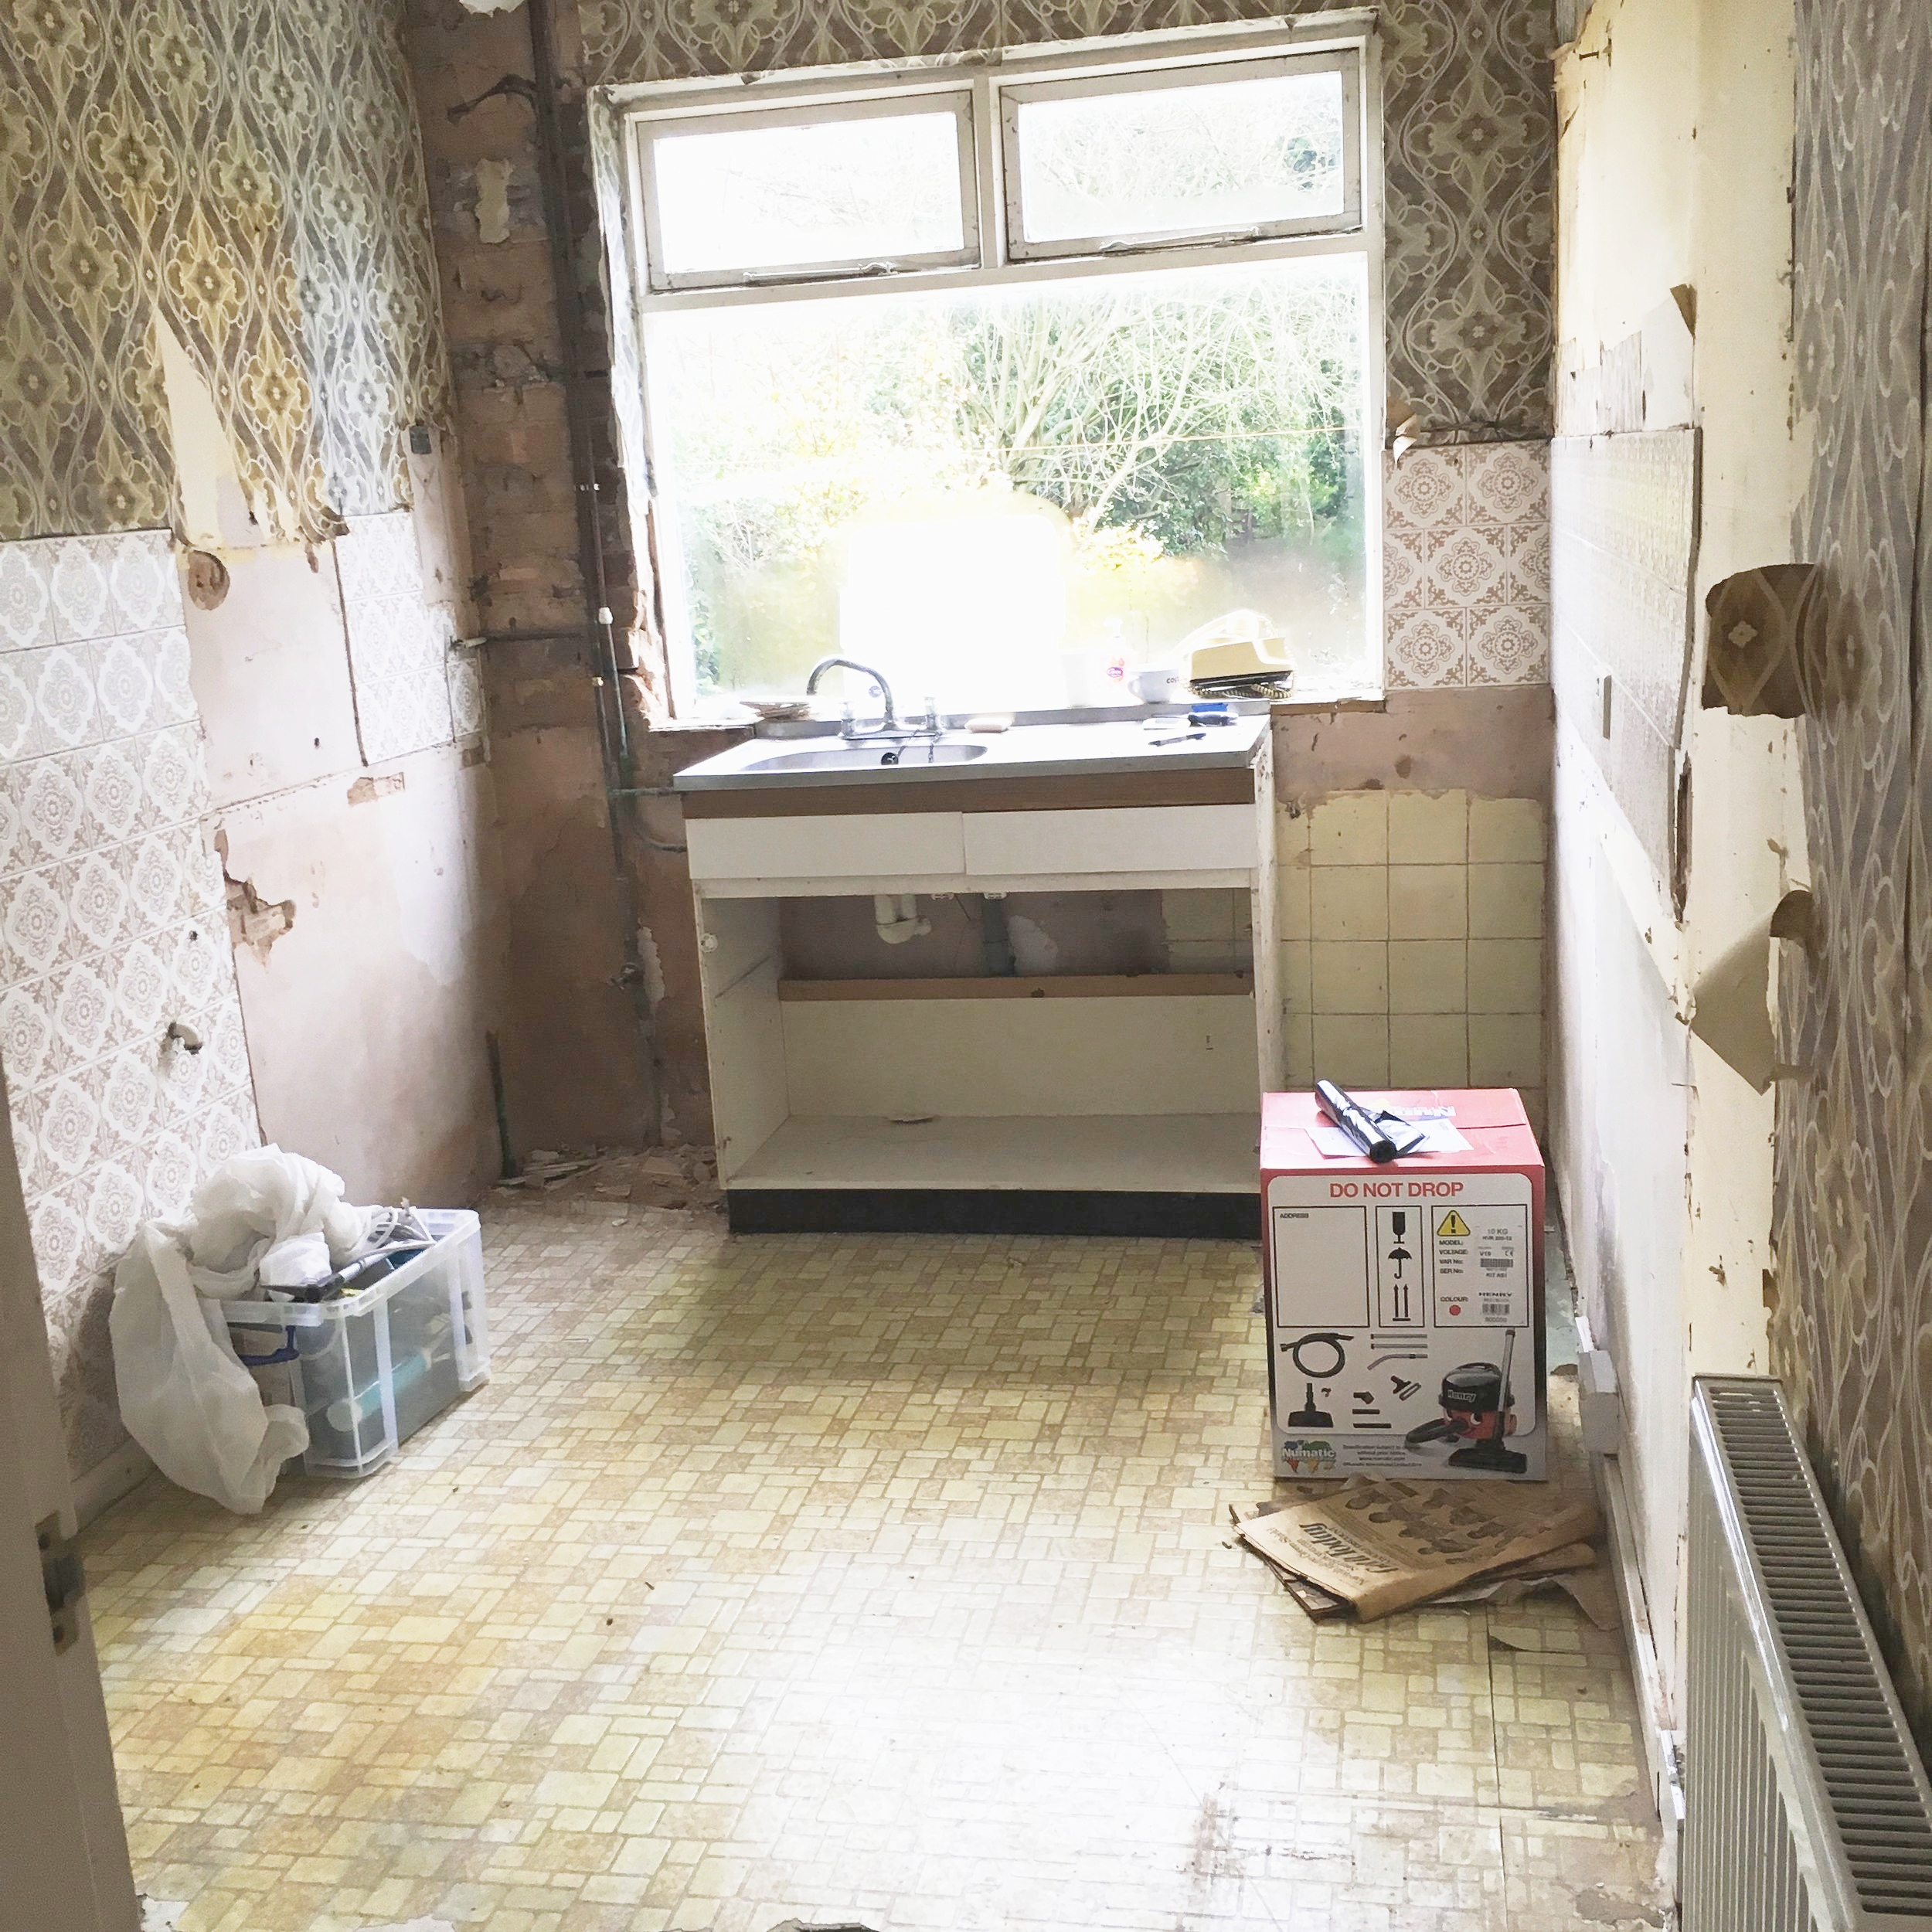
A Kitchen Makeover

Having purchased their first home together Hope (who works for IDEAS) & Adam knew there was lot to do to renovate their dated 1930s house into a home fit for modern living.

“We are really lucky that our garden is south facing, which is where our kitchen and dining room are, so we really wanted to maximise the feeling of space in these rooms as we originally had a tiny galley kitchen and quite a dark feeling dining room”, explains Hope. The first thing they did was rip out the existing 1950’s kitchen and knock through the wall that separated the kitchen/dining room.

The original back door and window to the kitchen were blocked up to make way for a run of tall housings to maximise the feeling of a much larger space in what is still essentially a galley kitchen. They chose the Remo handless door in cashmere with a Marble white quartz worktop and large central peninsular to organically combine both the spaces. On the opposite walls to the kitchen in the dining room two of the walls are painted in a deep, rich navy blue which gives such a cosy and inviting feeling to a room which otherwise could feel quite clinical. “I had a lot of people comment that I was making a mistake with the blue, but I felt with an off white gloss kitchen, in a south facing room it was needed otherwise we were in danger of having a room which would feel cold”.

After the months of renovating it is so lovely to have all our friends and family over for dinner parties and BBQ’s, it is such a brilliant entertaining space and we could not be happier with how the kitchen works for us!

THE KITCHEN BEFORE

THE KITCHEN BEFORE

THE KITCHEN AFTER

THE KITCHEN AFTER

THE DINING ROOM BEFORE

THE DINING ROOM BEFORE

THE DINING ROOM AFTER

THE DINING ROOM AFTER

The Quooker Boiling Water Tap

The Quooker flex tap is one of the IDEAS’ teams favorite kitchen products, an innovative and clever tap which saves money, water and makes a cup of tea in record time! The flex is the newest addition to the Quooker range combining a boiling water tap with a flexible pull out hose for easy cleaning around the sink. Once you start using the Quooker tap it is hard to imagine a kitchen without one, it eliminates the need for a kettle, therefore freeing up valuable workspace as well as having the option to provide you with filtered tap water.

Features

Did you know that the Quooker Taps are the only boiling water taps on the market that deliver your water at 100°C.There is a tap on the worktop and a tank underneath your sink to deliver you that perfect cup of tea everytime! You can choose to either have a separate Quooker tap next to your usual mixer tap or the Quooker flex/fusion which is single tap for hot, cold and boiling water. There is also the option to have a filtered water tank installed alongside your boiling water tank.

quooker-flex_nl_sla-700x400.jpg

Efficiency

If you are worried that the Quooker tap may be wasteful, think again! The high-vacuum insulation ensures that the Quookers standby usage is just 3 pence per day.  For an even more efficient tap choose a COMBI tank, an economical way to produce both hot and boiling water.

Safety

One of the questions about the Quooker is “Is it safe?”, the answer in short is extremely! Gone of the days of worrying about dropping the kettle, spilling it or scalding yourself with steam. The Quooker is fitted with a ‘push and twist’ child proof handle and insulated casing insuring it never feels hot to touch. The way the water is dispensed means the flow is more of a spray than a solid jet, giving you plenty of time to get your hands out of the way if the worst was to happen.

No kitchen is complete without its Quooker.

Pop into IDEAS Nottingham today to see how it works.